Kill the SMS Bill: Passwordless Login with Passkey (WebAuthn) for Vibe Projects
SMS codes burn money per message and still get intercepted. Passkey (WebAuthn) replaces SMS with device-side private-key signatures: the 7-step minimal loop, 5 security red lines, plus multi-device management, a loss-recovery playbook, and an 8-item launch checklist — zeroing out both login cost and entire attack classes.
Core argument: SMS OTP is a login scheme that "works but keeps burning money" — Passkey rips it out by the root
We previously published "Don't Let Verification SMS Bankrupt You", a guide about rate-limiting and anti-abuse so your SMS bill stays under control. That piece played defense — keep the SMS channel, but don't get farmed. This one plays offense: if your users are on phones or computers from the last three years, ship Passkey (WebAuthn) and rip the SMS verification line out by the root. No per-message billing, no risk of codes being relayed or hijacked, and the private key never touches your servers — there is nothing to leak even if you get breached.
Let's be clear about what Passkey is not: it is not "a cooler login button." It is public-key authentication built into the browser: the private key stays locked inside the user's authenticator (phone secure enclave, OS keychain, Windows Hello) and never leaves; your server stores only the public key. Each login, your server issues a one-time challenge, the device signs it with the private key, and your server verifies the signature. What the user feels is "one fingerprint tap and I'm in." What you feel is entire attack classes — credential stuffing, SMS interception, phishing for codes — disappearing, rather than "one more layer of defense."
1. Three passwordless routes compared: pick the right one before you build
There are three mainstream passwordless routes: Passkey, Magic Link (email link), and SMS OTP. Don't pick by gut feeling — read the decision table:
| Dimension | Passkey | Magic Link | SMS OTP |
|---|---|---|---|
| Marginal cost per login | ≈0, no third-party fees | Low, email sending cost negligible | High, billed per SMS |
| Phishing resistance | Strong: origin/rpId binding — a fake domain can't produce a valid signature | Weak: links can be forwarded, phishing pages can harvest clicks | Weak: codes can be socially engineered out of users, SIMs can be swapped |
| Hijack resistance | Strong: one-time challenge + private-key signature | Medium: token is one-time but the transport can be intercepted | Weak: SMS travels in cleartext over carrier networks you don't control |
| Login steps | 1 step: biometric confirmation | 3 steps: enter email → switch to inbox → click link | 3 steps: enter phone number → wait for SMS → type code |
| Cross-device | Strong (OS keychain sync) / Weak (single-device key) | Strong, any device with email | Strong, any phone receiving SMS |
| Implementation complexity | Medium, WebAuthn logic on both frontend and backend | Low | Low |
Scored on a 5-point scale (higher is better; cost = marginal cost per login, security = phishing & hijack resistance, experience = login-step smoothness), that table becomes the chart below: experience — Passkey 5, Magic Link 3, SMS OTP 3; security — Passkey 5, Magic Link 3, SMS OTP 2; cost (cheaper scores higher) — Passkey 5, Magic Link 4, SMS OTP 1. SMS OTP's 1 on cost is its original sin: it wins on neither experience nor security, and it keeps burning money.
" alt="Bar chart comparing three passwordless routes across experience, security, and cost: Passkey scores 5 on all three; Magic Link scores 3/3/4; SMS OTP scores 3/2/1">Figure 1: Three passwordless routes compared. Passkey takes a full 5 on experience, security, and cost; SMS OTP scores just 1 on cost — winning on neither experience nor its lowest-in-class 2 on security, while the meter keeps running. The takeaway is blunt: default to Passkey for new projects; Magic Link fits lightweight "email-is-the-account" products; SMS OTP is fallback-only material.
The decision in one sentence: new projects default to Passkey; live projects make Passkey the primary login and demote SMS OTP to fallback. Magic Link suits lightweight products where the email is the account (internal tools, newsletter-style products) — cheapest to build, but with a hard UX flaw: users must bounce between your app and their inbox, which feels especially fractured on mobile. Now the hands-on part: getting the minimal WebAuthn loop running.
2. The minimal WebAuthn loop: 7 steps + server pseudocode
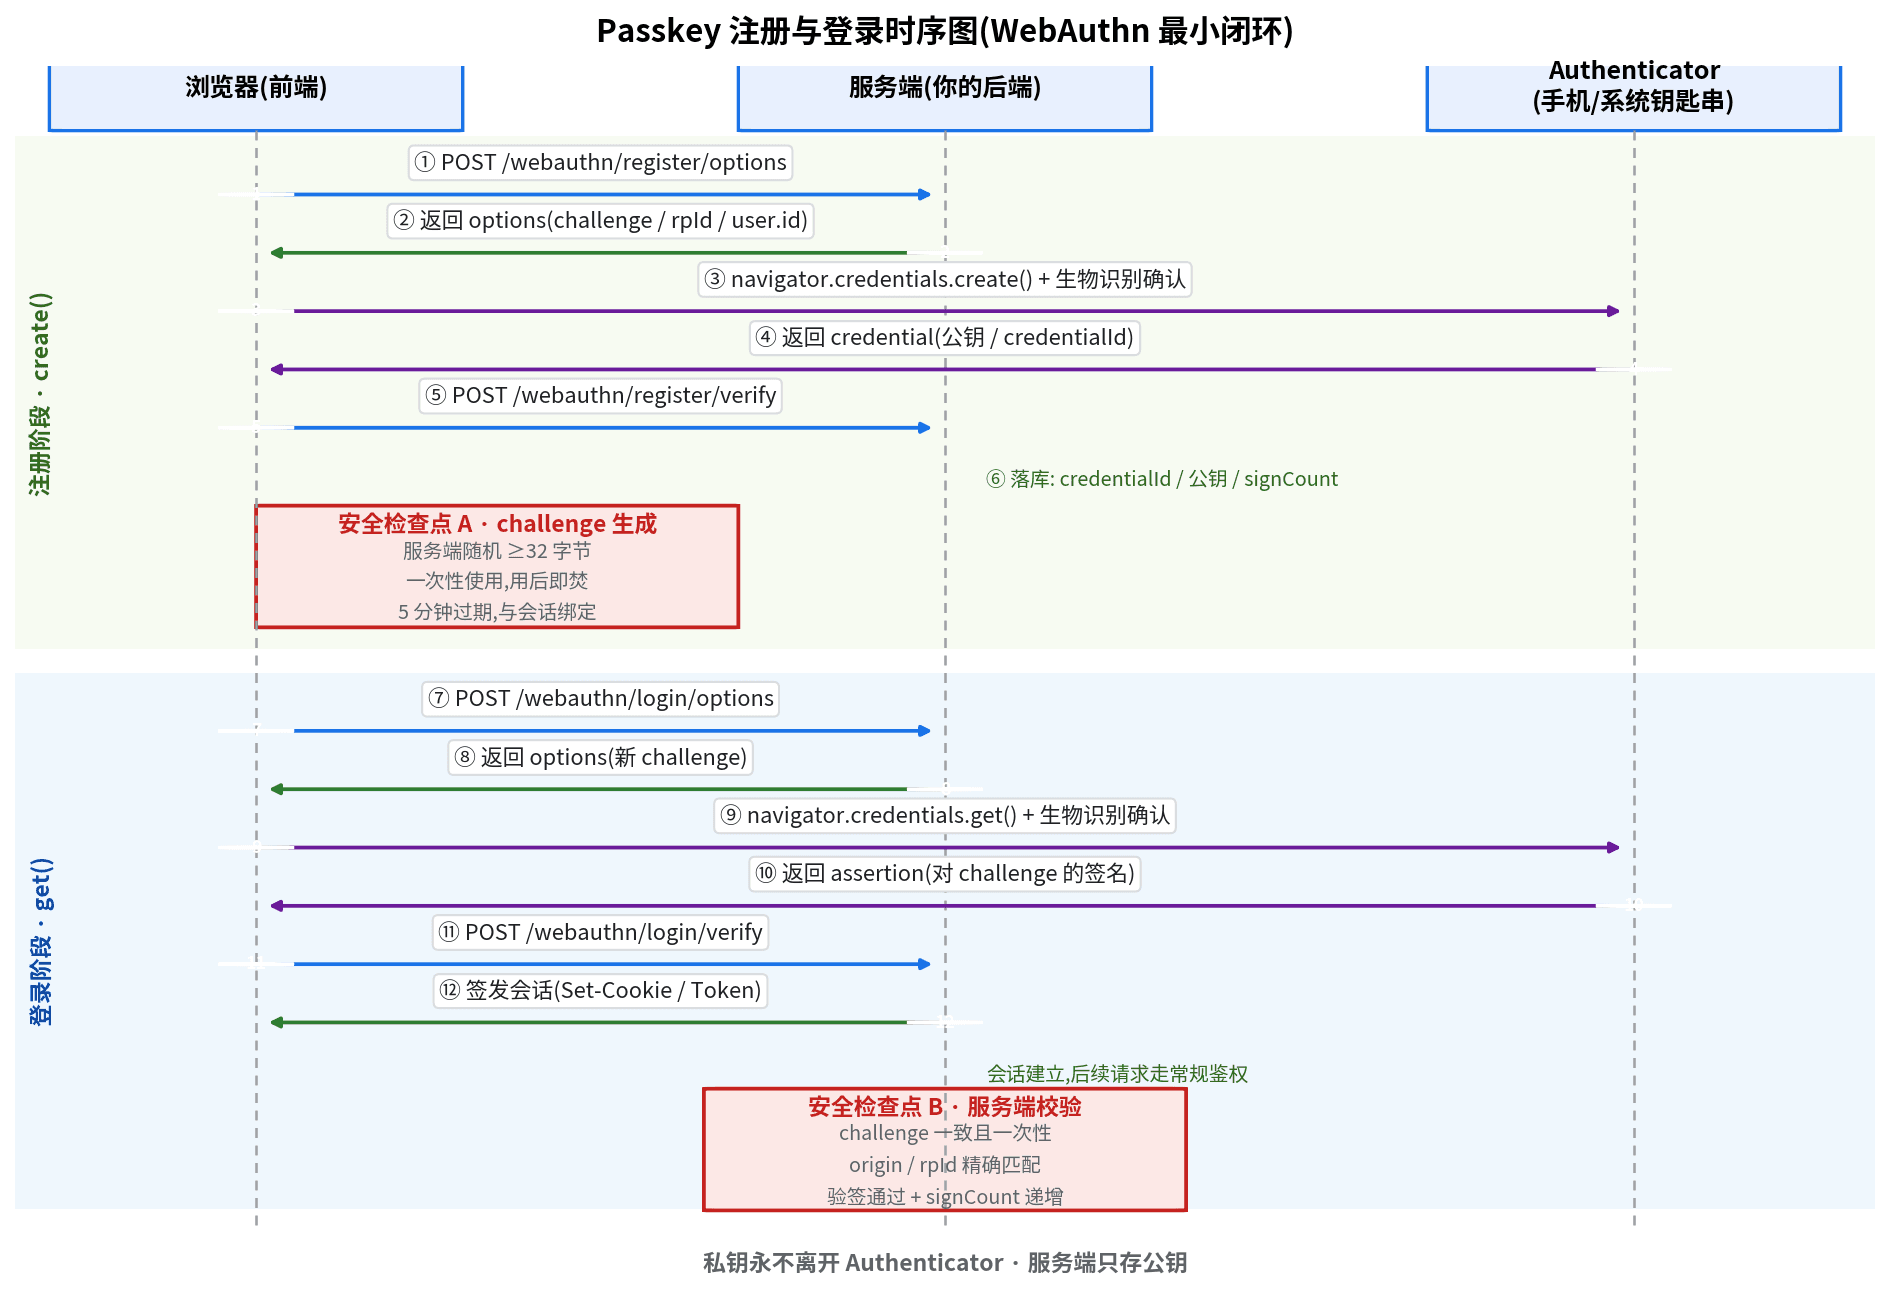
The whole principle in one sentence: at registration the device generates a keypair, the private key never leaves the authenticator, the public key goes in your database; at login you issue a one-time challenge, the device signs it, you verify. The loop breaks into 7 steps — the first 3 are registration (create), the last 4 are login (get). The diagram below expands these 7 steps into 12 concrete request/response pairs and marks two security checkpoints; look at the figure first, then read on:
" alt="Sequence diagram of Passkey registration and login: 6 registration steps across browser, backend, and authenticator for keypair generation and storage; 6 login steps for challenge signing, verification, and session issuance; with security checkpoints A (challenge generation) and B (server verification)">Figure 2: Passkey registration & login sequence (minimal WebAuthn loop). Registration: frontend requests options → server returns challenge/rpId/user.id → browser calls navigator.credentials.create() to trigger biometrics → the authenticator generates a keypair and returns public key/credentialId → frontend posts to verify → server verifies the signature and stores (credentialId, public key, signCount). Login: frontend requests options → server returns a fresh challenge → browser calls navigator.credentials.get() → the authenticator signs the challenge and returns the assertion → frontend posts to verify → server issues a session. Checkpoint A: the challenge must be server-random (≥32 bytes), single-use and burned after use, expiring in 5 minutes, bound to the session. Checkpoint B: challenge matches and is single-use, origin/rpId match exactly, signature verifies, signCount increments. The bottom line: the private key never leaves the authenticator; the server holds only public keys.
Registration (create). Step 1: the frontend calls POST /webauthn/register/options; the server builds the options — a random challenge (≥32 bytes), rpId (your domain — the domain, not the full URL), and user.id (a unique user identifier; prefer an internal UUID over a plaintext email). The challenge must live server-side (Redis is ideal, 5-minute TTL) and be bound to the current session — the first lock against replay. Step 2: the browser calls navigator.credentials.create(options), the OS prompts, the user confirms with fingerprint/face, and the authenticator generates the keypair inside the device — the private key stays locked in the secure enclave/keychain while the public key + credentialId return to the frontend. Step 3: the frontend calls POST /webauthn/register/verify; the server does three things — the challenge matches and is unused, the origin matches exactly (string equality, not contains), the signature verifies; then it stores credentialId, the public key, and the initial signCount.
Login (get). Step 4: the frontend calls POST /webauthn/login/options; the server generates a fresh challenge (single-use + 5-minute expiry again — never reuse the registration one). Step 5: the browser calls navigator.credentials.get(options), the user confirms biometrically, and the authenticator signs the challenge with the private key, returning the assertion. Step 6: the frontend calls POST /webauthn/login/verify; the server runs checkpoint B — challenge matches and is single-use, origin/rpId match exactly, the public key verifies the signature, and signCount increments past the stored value (the anti-cloning check, detailed in the next section). Step 7: once verified, issue the session (Set-Cookie or token) and let subsequent requests ride your normal auth — Passkey only proves "you are you"; session management stays exactly as it was, no rewrite needed.
Server pseudocode (Python-flavored; in production use a vetted library — see red line 5 in section 3):
# Registration: build options (step 1)
challenge = secrets.token_bytes(32)  # ≥32 bytes of true randomness
redis.setex(f"webauthn:reg:{session_id}", 300, challenge)  # 5-minute expiry
options = {
    "challenge": b64url(challenge),
    "rp": {"id": RP_ID, "name": APP_NAME},          # RP_ID = your domain, e.g. example.com
    "user": {"id": user_uuid, "name": username, "displayName": username},
    "pubKeyCredParams": [{"type": "public-key", "alg": -7}],  # ES256
    "authenticatorSelection": {"userVerification": "preferred"},
}

# Login: verify the assertion (step 6, checkpoint B)
saved = redis.getdel(f"webauthn:login:{session_id}")  # atomic take-and-delete: single-use
assert saved and saved.challenge == client.challenge, "challenge mismatch or already used"
assert client.origin == EXPECTED_ORIGIN and client.rpId == RP_ID, "origin/rpId mismatch"
verify_signature(credential.public_key, client.challenge, assertion.signature)
assert assertion.sign_count > credential.sign_count, "signCount did not increase — possible clone"
credential.sign_count = assertion.sign_count  # update the counter
issue_session(user_id)  # step 7: issue the session
Note the redis.getdel detail in step 6: single-use must be enforced atomically — "read it and delete it in one move," not "read it, verify it, then delete it." The latter leaves a race window under concurrency where one challenge gets verified twice. Redis GETDEL, or a database "mark-used + unique constraint," are the correct shapes; "delete after successful verification" is not.
3. Five security red lines: cross one and the whole thing is theater
WebAuthn security comes "by default" — but only if the server enforces all five checkpoints without exception. These are red lines, not suggestions — cross one and the entire Passkey login is theater:
Red line 1: the challenge must be server-random, single-use, and burned after use. Use a system CSPRNG (secrets.token_bytes / crypto.randomBytes), ≥32 bytes; store it in Redis with a 5-minute TTL; consume it with an atomic take-and-delete like GETDEL. The classic failure is "frontend-generated challenge" or "reused challenge" — AI-generated code especially loves hardcoding the challenge to make debugging easy; grep it out before launch. A predictable challenge means replayable signatures means Passkey for nothing.
Red line 2: origin and rpId must match exactly — string equality. This is the linchpin of Passkey's phishing resistance: the signature binds the rpId, so a phishing domain simply fails verification. Write client.origin == EXPECTED_ORIGIN — no contains, no regex, no wildcards "to make testing easier." Staging and production get different rpIds (auth-staging.example.com vs example.com); credentials must not cross environments — that isolation is the whole point of rpId, don't reuse the production rpId for tests to save effort.
Red line 3: signCount must be verified as increasing; on anomaly, alert and freeze. Each login's assertion carries a counter that normally increases monotonically; if an incoming signCount is less than or equal to the stored one, the private key may have been cloned onto a second device (two devices incrementing independently desync the counter). The response: reject the login, notify the user, and offer a "revoke this credential and re-register" path. One caveat — passkeys synced via iCloud Keychain can legitimately report 0 or non-increasing signCount in multi-device sync scenarios — so land this as "alert + human review," not "permanent ban on first offense."
Red line 4: choose userVerification per scenario, not one-size-fits-all. preferred (use biometrics when available, fall back to PIN/pattern) fits everyday login with the widest coverage; required (mandatory biometrics/PIN) is for sensitive actions — payments, password changes, device revocation; discouraged should almost never be used — it surrenders "proof it's really you" and degrades to "proof someone holds this device." A practical pattern: daily login on preferred + conditional mediation (autofill — the user doesn't even click a button); step up to required when entering the "account security" page.
Red line 5: never roll your own crypto — signature verification and attestation parsing go through vetted libraries. Node: @simplewebauthn/server; Python: webauthn (by Duo); Go: go-webauthn/webauthn. Hand-assembling COSE public keys, hand-parsing CBOR attestations, hand-rolling ES256 verification is digging your own grave — these libraries already handle rpId hash comparison, aaguid parsing, and certificate-chain validation. Your code should be three things: generate and stash the challenge, call the library's verify, store/update the credential. Treat any hand-written bare crypto.verify call as a smell.
4. Multi-device management: registration, loss, and merging — no legacy user left behind
The most underestimated part of shipping Passkey isn't the WebAuthn protocol — it's the human part: users own 3 devices, have lost 1 phone, and hold an account registered with a password 2 years ago. Leave these unplanned and support gets flooded on day one.
Multi-device registration: one account, N credentials, managed independently. Put an "Add this device as a Passkey" button on the account settings page; it runs the 3 registration steps. In the database, one user.id maps to multiple credential rows (credentialId, public key, signCount, device nickname, created-at). Each row can be named ("MacBook Pro," "Pixel 9") and revoked individually. When a user registers their second passkey, show a light nudge: "Enabled on 2 devices — losing one won't lock you out." That builds recovery awareness at zero cost.
Device-loss recovery: the recovery path must exist before the phone is lost. This is the real single point of failure in a Passkey scheme: the private key never leaves the device, so a lost phone means that credential is gone forever. Recovery isn't "post-incident remediation" — it's "pre-incident configuration": ① guide users to register at least 2 passkeys (phone + computer); ② use email Magic Link as the backup recovery method, not SMS OTP — otherwise the whole scheme's security level collapses back to the SMS line and the migration was pointless; ③ protect the recovery flow itself: freeze sensitive actions (password change, withdrawals, account deletion) for 24 hours after a new-device recovery, and email the account's address — "your account recovered login on a new device; freeze immediately if this wasn't you." Rehearse the full "lost phone → email recovery → revoke old credential" flow end to end, time it, and only ship once it completes in under 5 minutes.
Merging with existing password/OTP accounts: no forced migrations. Legacy users are already in your database, so the strategy is "upgrade after login": the user signs in with their old password/OTP, sees "Upgrade to Passkey login — one click" on the settings page, runs the 3 registration steps, and the credentialId binds to the existing user.id — the account system doesn't move; only a login method is added. Keep password + OTP entrances during the transition and instrument Passkey login success rates; when Passkey share holds above 80% for 4 consecutive weeks with failure rates under 2%, prompt users to turn off password login (don't force — give them the choice, but spell out the "faster and safer" upside). The two things to never do: "new users get Passkey-only" (locks out old-device users — see section 5's fallback) and "force-migrate legacy users" (melts the support queue).
5. Compatibility matrix & fallback: Passkey isn't 100% coverage, but failure must be graceful
The compatibility picture first (as of late 2026): iOS 16+ / macOS Ventura+ (iCloud Keychain sync out of the box), Android 9+ (Google Password Manager), Windows 10 22H2+ (Windows Hello), and Chrome / Edge / Safari / Firefox from the last two years — together covering the vast majority of real users. But "the vast majority" isn't "everyone": aging Android devices, corporate-locked Windows 7 boxes, users who disabled the OS keychain in private mode — all land on the branch where navigator.credentials doesn't exist or conditional mediation throws.
Three fallback rules, in priority order: first, when WebAuthn is unsupported, fall back to Magic Link — not SMS. Section 1 already did the math: Magic Link scores 4 on cost and 3 on experience; SMS scores 1 on cost — don't let the fallback burn money either. Frontend detection is trivial: check window.PublicKeyCredential; when absent, hide the Passkey button and show "Sign in with email link." Second, when conditional mediation (autofill) fails, render an explicit button. Autofill is the silkiest form (the username field itself offers "Sign in with passkey"), but it's blocked in some browsers and iframe contexts; catch the exception and show a clear "Sign in with Passkey" button instead of leaving users staring at a dead input. Third, instrument the fallback rate — above 15%, stop making Passkey the default. Fallback rate = fallback-link logins / total logins. If your user base skews old-device (say, checkout tablets at small merchants), ship Passkey as "the optional faster way" first, not the default — forcing a login that 30% of users can't use is a product incident.
One more cross-platform detail: rpId defines the passkey's scope. Set rpId to example.com and both app.example.com and www.example.com share the same passkey; set it to app.example.com and the main site can't use it. So pick your root domain as rpId from day one — once set, rpId can never change; changing it means making every user re-register.
6. Launch checklist: 8 items, all green before you ship
Go down the list one by one — a single red item means no launch:
1. rpId matches the production domain. Staging uses its own rpId (e.g. auth-staging.example.com); reusing the production rpId for tests is forbidden. Before launch, confirm RP_ID and EXPECTED_ORIGIN (scheme + host + port) match the real domain character for character.
2. The challenge pipeline is correct. ≥32 bytes of true randomness, Redis storage with 5-minute TTL, atomic take-and-delete on verify, bound to the session. Grep the codebase for hardcoded or frontend-generated challenges.
3. Origin allowlist uses exact matching. String equality only — no contains, no regex, no wildcards; while you're at it, confirm the CORS config isn't letting hostile origins in.
4. signCount increment verification + alerting. On a value at or below the stored one: reject the login, send a security notice, offer revoke-and-re-register; the alert must reach your on-call channel, not just a log file.
5. Attestation policy is explicit. Start with none (skip device-cert validation, best compatibility); move to direct with a trusted-aaguid list for finance/payment scenarios. Write the policy down — don't make the next engineer guess.
6. Multi-device and recovery rehearsed. Register a second passkey, revoke a single credential, and walk the full "lost phone → email Magic Link recovery → revoke old credential" flow with a stopwatch — under 5 minutes; the 24-hour sensitive-action freeze + notification email after recovery are verified.
7. Fallback works and is monitored. Absent window.PublicKeyCredential auto-switches to Magic Link; the fallback-rate dashboard is live, alerting past 15% with a human decision on whether to pause default-on.
8. Session & notification hygiene. After a Passkey verification passes, issue a fresh session and revoke the user's old session tokens (no "still logged in on the old device"); first Passkey login, new device added, and device revoked all trigger email/push notifications.
Closing judgment: Passkey deletes "verifying the user" from your ledger
Let's close the books. The SMS OTP model is: every new user and every new login adds cost and adds risk — the SMS bill grows linearly, and the code-interception attack surface never goes away. The Passkey model is: the private key is in the user's hands, verification completes in mathematics, and your servers hold no password database to leak, no SMS bill to burn, no "code was relayed" tickets to answer.
For vibe projects this trade is especially favorable: with a small team, the security budget belongs on "making entire attack classes disappear," not on "blocking each attack one by one." And don't overreach on the rollout: spend two weeks getting section 2's 7-step minimal loop running (3 registration steps + 4 login steps), then work through section 6's checklist item by item, keeping the SMS channel as fallback-only — Magic Link first, SMS last. The day you watch the SMS bill hit zero while login conversion climbs, you'll understand: the best verification code is the one that never needs to be sent.
Comments (0)
Related articles
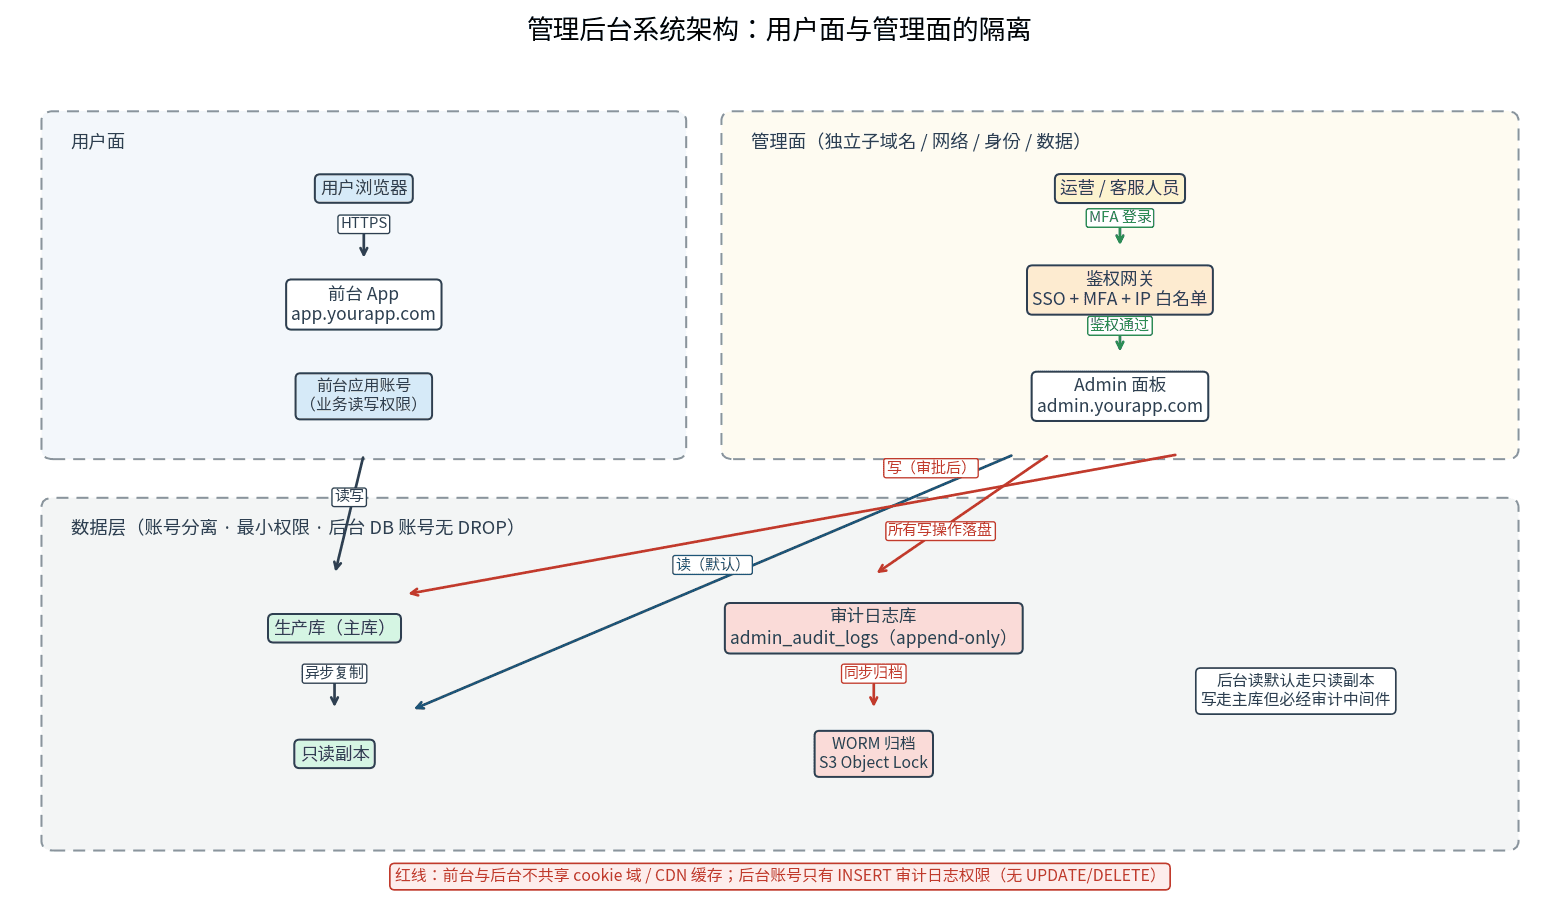
A launched project without an admin panel sends you back to hand-writing SQL over ssh at the first support ticket. This guide starts from the day-1 MVP feature list: the admin feature matrix across users, orders, content, and config; three role tiers with three isolation layers; human-review double confirmation for dangerous actions; append-only tamper-proof audit logs; a time-limited-token impersonation safety chain; plus a Retool-vs-custom build comparison and an 8-item launch checklist.

User emails and login tokens sitting in your console.log? This guide gives solo teams a complete log-redaction playbook shippable in a day: a four-tier PII classification table, copy-paste TypeScript redaction trio, minimal console.log-to-pino migration, request-logging middleware templates, Sentry beforeSend config, tiered retention and cost math — plus 8 real-world pitfalls.
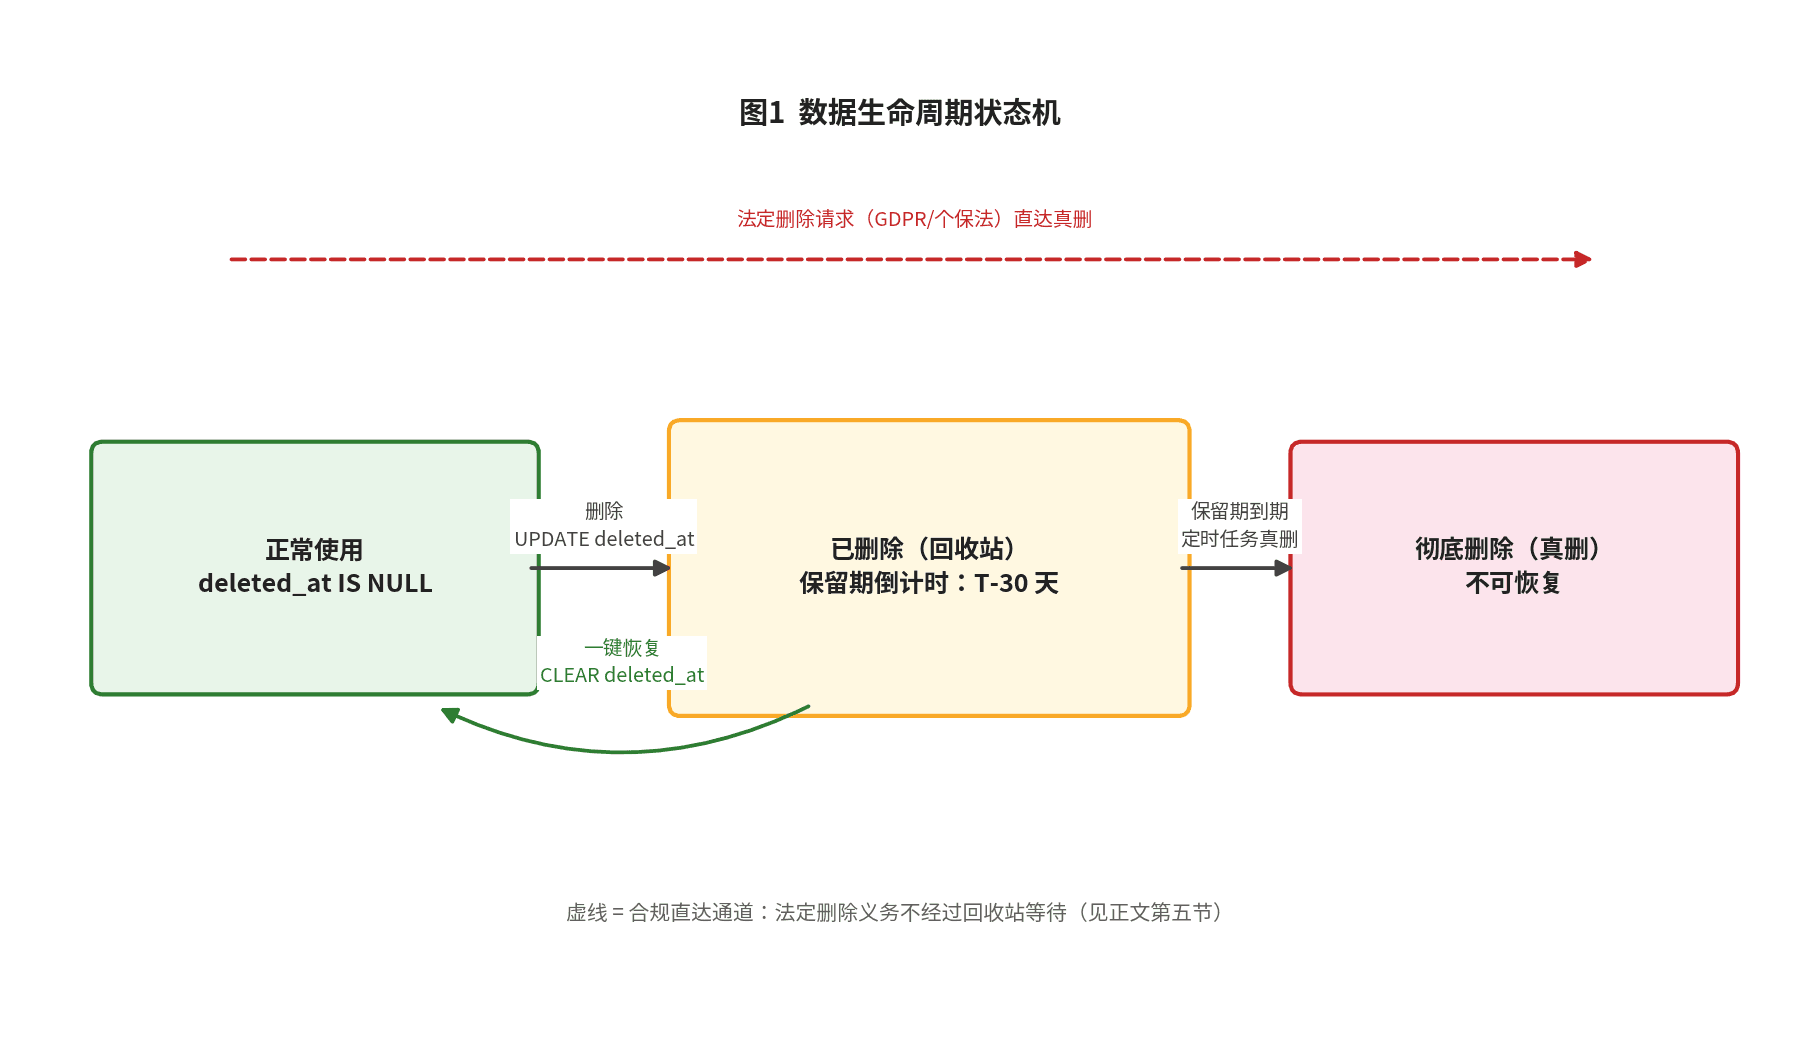
Backups are the last line of defense; the trash bin is the first. This hands-on guide covers the three delete semantics, deleted_at data modeling, partial unique indexes, Prisma query-layer guards, tiered trash-bin retention, GDPR/PIPL erasure reconciliation, and an 8-item launch checklist.